
It’s happened to us all, your system is working perfectly and yet, you decide to make a single change to a configuration file. The system breaks. Suddenly, in an attempt to fix the issue, you end up creating three more problems with a dozen you are not even aware of yet. This is a nightmare, and its the reason why we back things up. Whether it’s your personal files, system configurations, or even your entire operating system, having a reliable backup ensures that you’re always just a few clicks away from recovery.
in this article, we’ll dive into how you can use Timeshift to back up and restore configuration files on your Debian-based Linux system. Timeshift is a powerful tool that acts like the System Restore function on Windows or Time Machine on macOS. While it’s not designed for backing up personal files, it’s an excellent solution for saving system configurations, making it easier to undo the damage if an update goes wrong or if you accidentally configure something incorrectly.
If you’re looking for a simple yet effective way to safeguard your system’s settings, Timeshift is perfect and takes minutes to learn.
Installing Timeshift
To search for Timeshift in the App Center, type “Timeshift” into the search bar, but do not press Enter. After a few seconds, it should appear in the list of results. If you’ve already pressed Enter and can’t find it, the app center is filtering Snap packages by default. To fix this, simply change the filter from “Snap” to “Debian packages,” and you should be able to find Timeshift.
Timeshift can also be installed via the terminal:
sudo apt install timeshiftTimeshift Setup Wizard
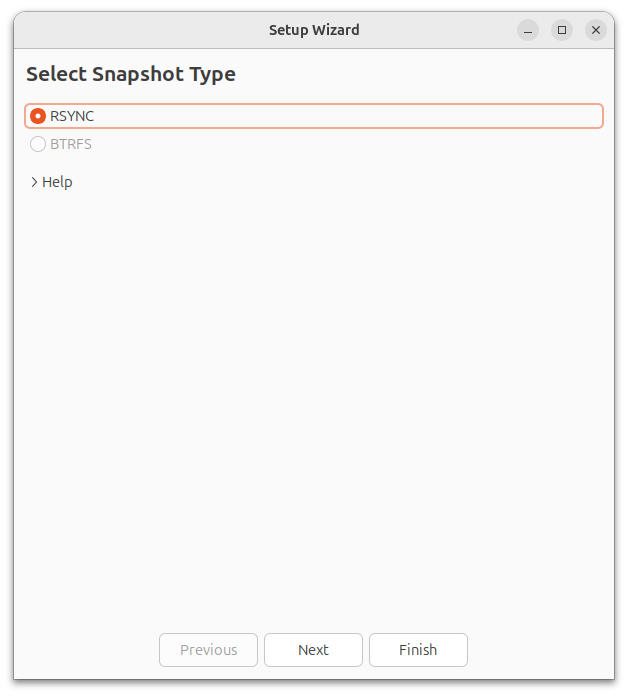
Snapshot Type
When you launch Timeshift, you’ll be prompted to authenticate by entering your user password. The next step is to choose a snapshot type. On my system, RSYNC is the only available option. RSYNC works by copying all files during the creation of the first snapshot, and then it takes incremental snapshots afterward. This means that only the files that have changed since the last snapshot are backed up. For files that haven’t changed, Timeshift uses hard links from the previous snapshot, which saves space while maintaining the backup.
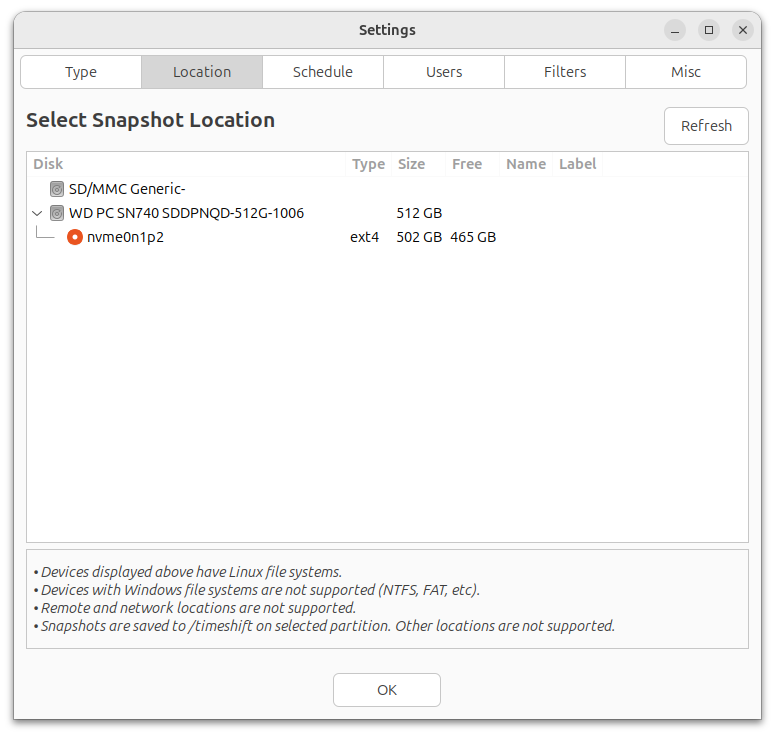
Snapshot Location
Next, you’ll need to choose where you want to store your snapshots. Ideally, this should be a secondary internal drive or an external drive that is separate from the main drive your operating system is installed on. The reason for this is if your main drive fails, any snapshots stored on it would be lost as well.
For my own setup, I’ve chosen to save snapshots on my main drive, since my goal with Timeshift is to roll back to previous system configurations if something goes wrong while I’m making changes or updates. I’m not using Timeshift for full system backups, but rather as a safeguard to recover from potential misconfigurations.
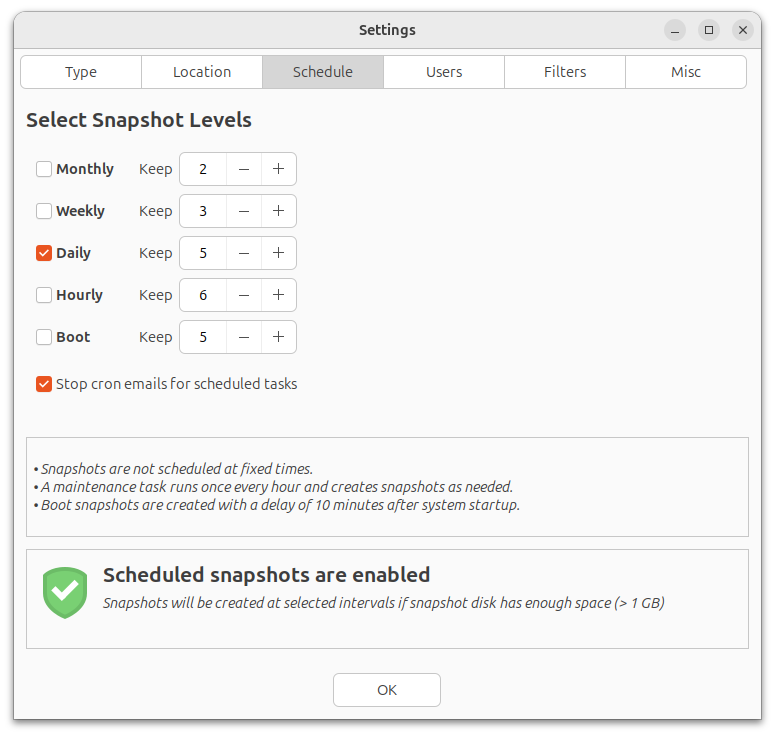
Snapshot Schedule
Timeshift offers a lot of flexibility when it comes to snapshot schedules. You can set it to take snapshots on boot, hourly, daily, weekly, or monthly. This allows you to tailor your backup strategy to your usage patterns. You can configure Timeshift to limit the number of past snapshots it retains, which helps conserve storage space by automatically deleting older snapshots as new ones are created.
For my setup, I’ve chosen to have Timeshift take a snapshot every day and keep the last five snapshots, ensuring I have enough recovery points without using up too much disk space.
Snapshot Exclusions
The users and filters sections in the Timeshift settings allow you to exclude certain directories from snapshots, such as a user’s home directory or the root directory. This is an important feature because if you were to restore a system snapshot that included the home directory, any files a user saved since the last snapshot would be overwritten and potentially lost.
The main purpose of Timeshift is to create system restore points in case your system breaks after an update or configuration change. It’s designed to restore the system to a previous working state without affecting user files. By excluding home directories from snapshots, we ensure that personal files are not overwritten during the restore process.
Ensure your root and user home directory are excluded from the snapshot to ensure none of your personal date is lost.
Creating Snapshots and Restoring to Previous Snapshots
It could not be easier to create a snapshot in Timeshift. Simply select create and it will create a snapshot using the settings you configured in the last section
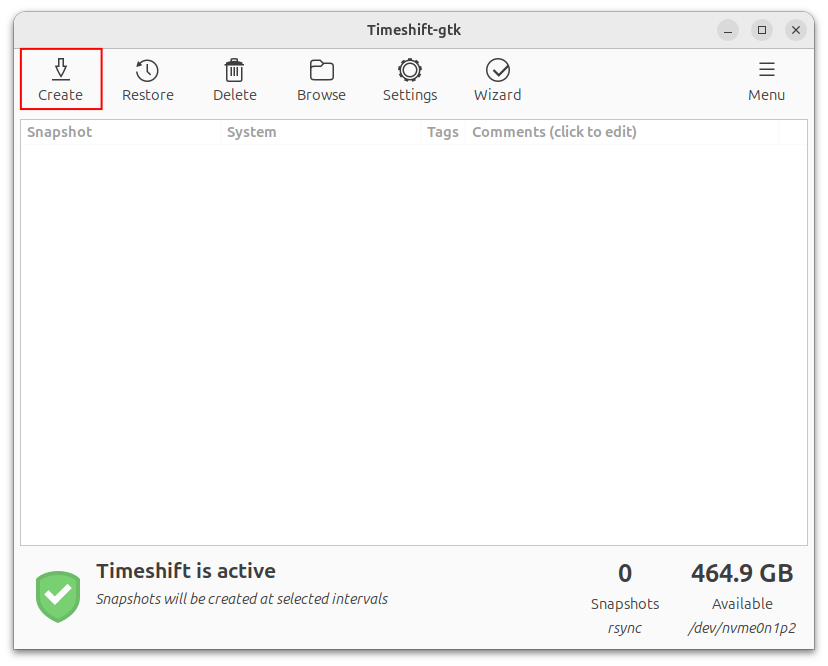
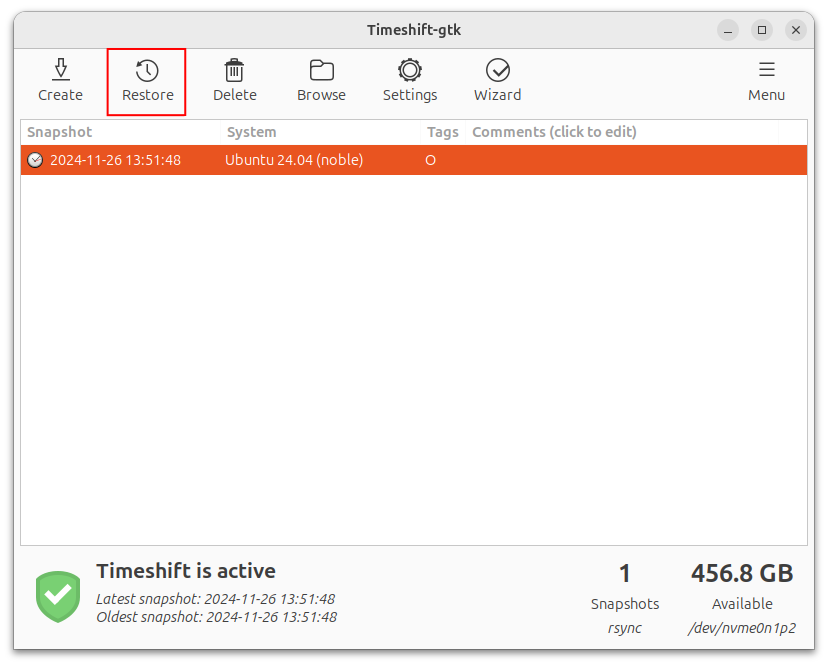
When a snapshot is created, you can restore to that snapshot by selecting it from the menu and clicking restore.
Restore Testing
To test that the application was working properly, I installed an application using the app center and perform a restore from the first snapshot created in the last section. When the restore process completed, the application was no longer on the system, confirming the snapshot restore worked properly.
Conclusion
Having a backup solution in place when configuring systems brings a huge sense of peace of mind. With Linux-based systems, the sheer number of configuration options can be overwhelming, and a small mistake can sometimes cause parts of the system to break. By taking snapshots with tools like Timeshift, we can easily roll back to a known good configuration when things were working. This snapshot system provides the freedom to experiment and make changes without the fear of permanently breaking the system.
Leave a Reply